A Window Never Forgets

The great Nathaniel Hawthorne once said, “Time flies over us, but leaves its shadow behind.”  With the passing of time we often find that the shadow of our past becomes faint.  It becomes more and more difficult to remember when that shadow was first cast.  It is then that we become thankful for the tangible items we have that represent those years.  What better way to embrace and remember those times than by making a beautiful, decorative piece for your home.

Old windows are one of my favorite things…and hot dogs.  I really love hot dogs.  I digress!

I’m always in search of windows.  I most frequently find them at yard sales or junk stores, but due to the recent increase in popularity they are often priced a little too rich for my blood.  So when I find them for cheap, I snatch them up for future projects.  One such project that will add to your wall decor is this beautiful and personalized memory window.

This particular project was done for a family friend and highlighted their children and grandchildren.  In today’s times of social media, this is even a project you can do as a surprise by canvasing Facebook and other outlets to find great pictures of a friend’s family.

Simply begin by cleaning the glass of the window and deciding how many pictures you would like to showcase.

By cutting the pages out of a photo album found at almost any store, you can secure them to the glass with double sided tape allowing the opportunity for pictures to be changed out in the future.

Photo Album Pages

The pages of an affordable photo album will house and protect the photos

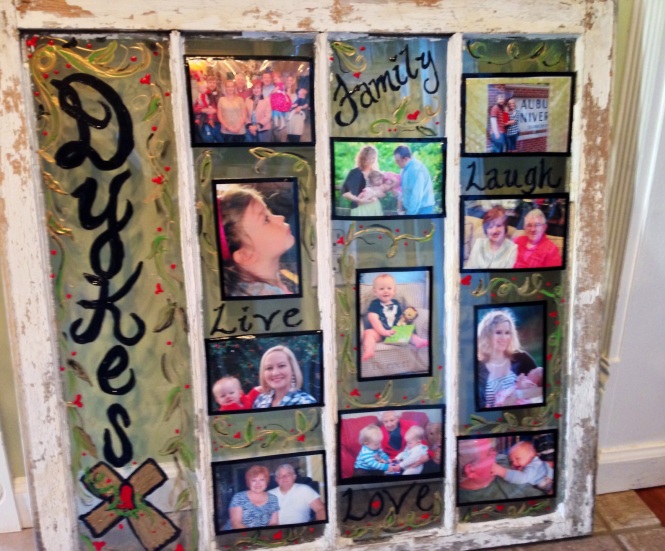
The particular window used in this project was not your traditional, six paned window.  With four column panes, the last name of the family was painted on the first pane with some decorative accents.  By using slick paint that can be purchased at any craft store, you are able to add dimension to your design.  A modified leaf and vine design was used on this window.

Name Panel A Window Never Forgets

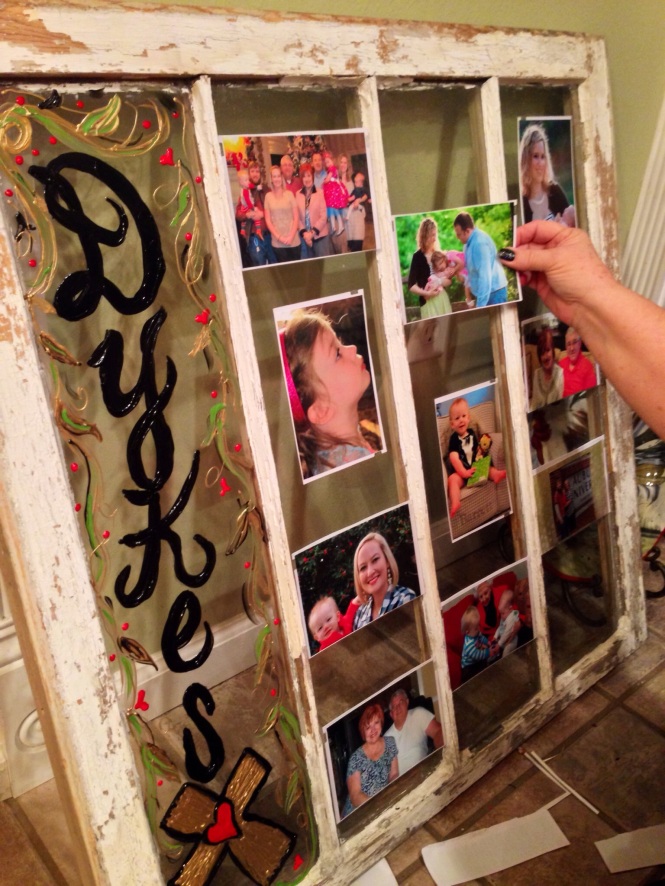
While the “name panel” was drying, the photo sleeves were placed onto window using double sided tape.  Space out the photos as you see fit and allow room for any painted designs that you would like to add.

Picture Placement A Window Never Forgets

Word and Pic Close Up A Window Never Forgets

Customize your window by adding words that reflect the style of your photos

Photo Cluster A Window Never Forgets

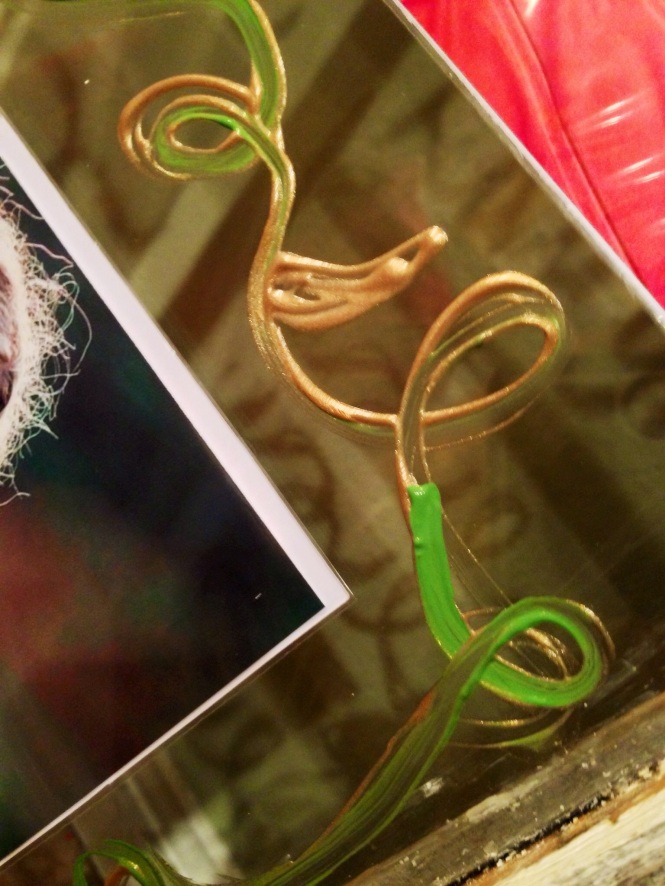
In addition to words, add personality by inserting scroll work, leaves, or decorative accents with slick paint

Corner Detail A Window Never Forgets

With a light brush stroke you can easily create accents that add to your design

Once you have completed all your photo placement and painted accents you are ready to add your fixtures to hang your window.

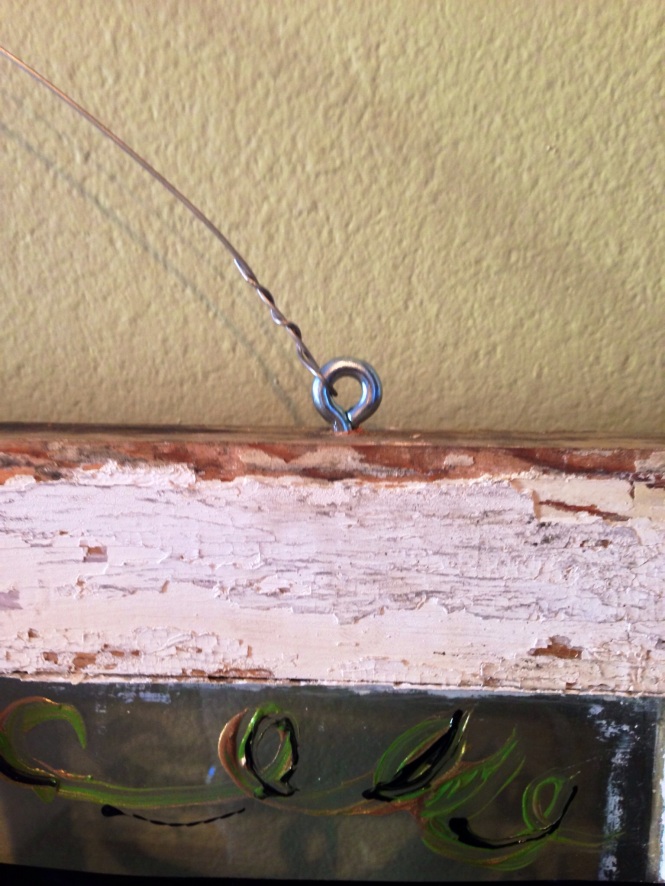
Eye Hook Hanger A Window Never Forgets

By inserting a basic eye hook, you can attach a heavy gauge wire from which to hang your window

Now you are ready to hang your beautiful wall decor!  The weight of the window can possibly be an issue so make sure you use a fixture that is sturdy enough to support your Memory Window.  I recommend something like a Hercules Hook.  They are great for anchoring large items, but do not damage your wall.

Completed Window A Window Never Forgets

Even though our minds fail us and the memories may fade, you can always remember the past with a beautiful item like this displayed in your home.  Have confidence in your work and add your own style and flair to this piece and enjoy it for years to come.  Your creativity and little DIY know-how is sometimes all you need to stay stylish!

A Stylish Steed Christmas – Day 9

Christmas may be the most wonderful time of the year, but it is also the most expensive time of the year.  With parties, gifts, charities, and more, the bills can sure add up quickly.  With the impending debt that you see adding up before you, let’s look at some décor for our home that won’t break the bank.  In fact, these impressive additions to your home might not cost you anything at all.

On the ninth day of Christmas The Stylish Steed gave to me, décor for the penny pincher in me.

We all have things lying around the house or garage that we don’t use.  In many cases, it is leftover items from a weekend project or an activity from the warmer months.  What better way to save money than make some beautiful display pieces from items that are doing nothing but collecting dust.

Stacked Tree
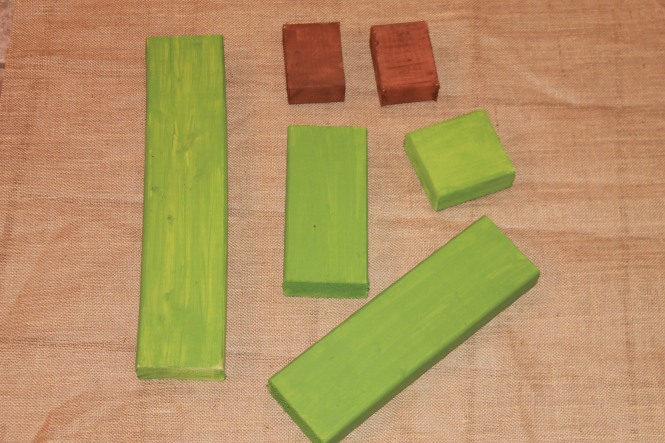
If you’re like me, I always over-estimate when it comes to purchasing supplies for a project, and then, in turn, am left with tons of leftovers.  That scenario was what brought me to create this great stacked Christmas tree.  Using leftover lumber, I am able to bring a personalized piece to my home décor for Christmas.  I had some extra scrap pieces of 2×4’s from a weekend project.  You can do the same with your scraps.  You will need six pieces of wood in the following lengths:

(2) 2 ½”
16”
12”
8”
4”

After cutting the pieces to the appropriate lengths I painted the two short pieces brown and the remaining pieces in a leaf green.

IMG_8923

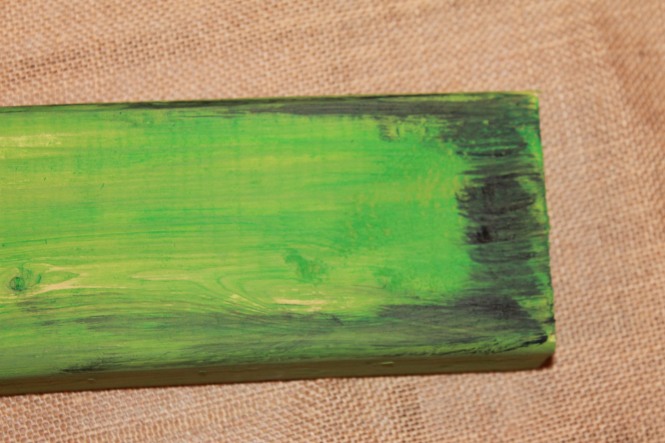
After the paint was dry I added an aged look to the wood by painting black on the edges and smearing it with a wet paper towel.  Always remember to rub the paint with the grain of the wood.  This wet rubbing will also give you the opportunity to take off some of the green paint to add to the weathered look.

IMG_8924

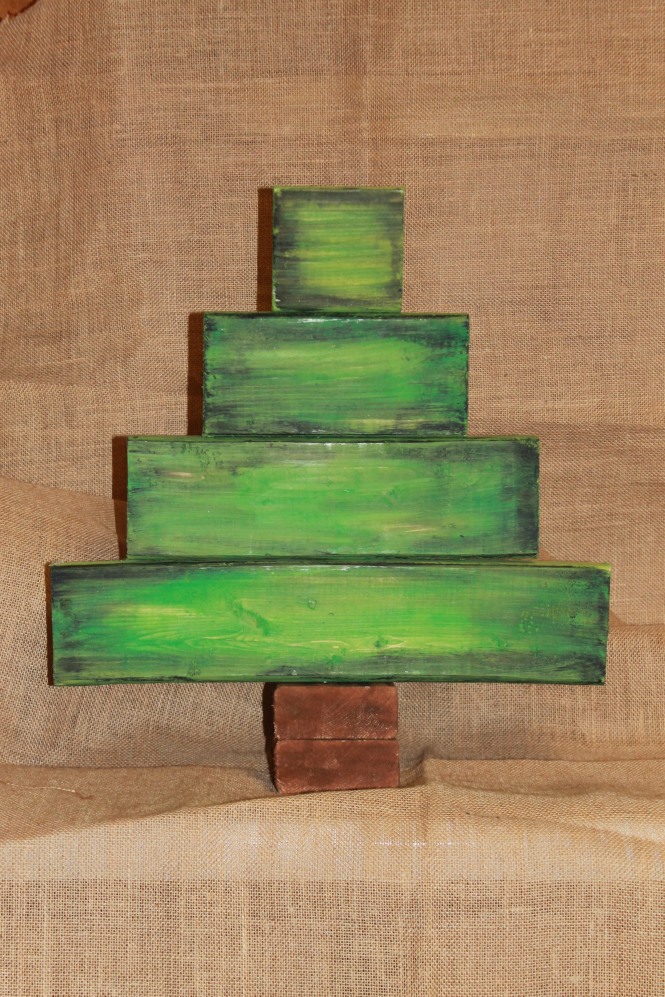
When the distressing was dry I measured and centered the boards atop one another and secured them with hot glue.

IMG_8971

Now you could leave this tree just as it is, but I decided I needed a little more personality.  I decided to write a holiday message on mine.  After painting my words and some details of dots and stars, I hot glued a star cookie cutter to the top.   It was now ready to display.

IMG_8970

The only cost I had in this project was my cookie cutter, which was less than $1.00!  You can’t beat that with a stick…or a scrap piece of 2×4.

Tomato Tree
This summer I decided to try my hand at gardening.  For the first time ever I grew tomatoes, banana peppers, and bell peppers.  For the most part it was a huge success.  My one little tomato plant produced enough tomatoes to feed a third world country for at least 6 months.  Needless to say, I spent my summer giving away tomatoes to anyone who passed by.  However, now that the first frost has come what do I have left?

tomato cage

A great way to re-purpose out of your garden is by creating this tomato cage tree.  By using that old tomato cage, you can transform your gardening garbage into holiday works of art.

The first step in your creation is securing the top pieces together with wire to form the point of the tree.

tomato cage top secured

Next, I chose a fabric that would best coordinate with my decor.  I went with an inexpensive muslin material because you know I love my rustic looks.  Beginning at the top of the tree, I attached four long strips of fabric to the top of the tree with jute.  I made sure that each strip was lined up with the vertical support of the cage.

tomato cage cloth top

Allowing the fabric to billow, you will work your way down the cage, attaching the fabric along the way to create a billowing effect that will look like snow laden branches.

tomato cage billowing

(Pardon the blue glow.  I was watching The Real Housewives of Atlanta while I worked on this.)

When you have reached the bottom of the tree, cut off any excess fabric to insert later for filler.

tomato cage billowing complete

When all four vertical pieces have been secured, you then use the same process to fill in the gaps with the excess fabric.  When the filler pieces are inserted, you have yourself a finished tree!

tomato tree completed

To give your tree a more natural look, consider inserting branches or leaves to the design.  Something like pine branches or magnolia leaves would be a great addition.  I think inserting pine branches in a tree wrapped in light fabric would give the look of a snow cover pine tree.  You can even choose to wrap the cage in lights before adding the fabric to give your tree a glow!

If you are placing this outside, you may find it useful to insert it into a large pot to avoid any wind from blowing it over.

I am sure that you have seen a similar process done with tomato cages before.  Most always, these trees are done with deco mesh ribbon.  I, personally, am not a fan of the mesh ribbon because EVERYONE uses it for wreaths and decorating.  I chose to go with the fabric and also used a technique that I have not seen before.  I love the outcome of this tree.  I am sure it will look great on my front porch.  Who knows…you might get to see it later!

O Christmas Tray
(You sound like a true southern when you read that out loud)
Another great recycled project is this tiered tray tree.  I am sure that all of you have a similar display pieces stowed away in a closet somewhere.  Maybe you have used it to display cupcakes at a party.  By adding a few little touches of Christmas cheer to this tiered tray, you create an instant centerpiece for your dining room or a great addition to your coffee table. 

This project is super easy and only requires a few items.  I chose to tie strips of muslin and burlap to the edges of my trays.  Next, I simply placed pine cones and Christmas ornaments in each of the trays.  Your finished product greatly resembles a beautiful Christmas tree.

tiered tray tree1 tiered tray tree2 tiered tray tree3

Of course mine is a little rustic.  You could easily create yours to fit your decor.  A little spray paint and glitter on the pine cones would completely soften the look of the entire display.  Add some beautiful blue and white ornaments and attach some snowflakes or glittered ribbon, and you’ll be walking in a winter wonderland all season long.

Three great ideas that are high impact and low-cost.  I love all of these pieces in my home for the holidays and hope you enjoy them as well.  Look around your garage and basement and see what “junk” you can use to recreate an awesome piece for your holiday home.  Until next time, stay stylish!

A Stylish Steed Christmas – Day 6

We are to the halfway point!  Are you exhausted yet?  Don’t give out on me now; this is a marathon, not a sprint!  Stay hydrated folks!

The holiday season brings such a wonderful display of decorations that warm the soul.  Trees strung with twinkling wonder, snow laden hills, trumpeting angels atop evergreens…the list could go on and on of the wonders of the holidays. With all these decorative possibilities, I often find myself struggling for decorations to put on my doors.  I think decorating doors within your home is an easy way to add to the holiday feel of your decor, but I get tired of seeing wreaths.  I need something different.  And if you can’t find what you want, why not make it?

On the sixth day of Christmas The Stylish Steed gave to me, unique pieces to use as door hangings.

Fleece Square Wreath
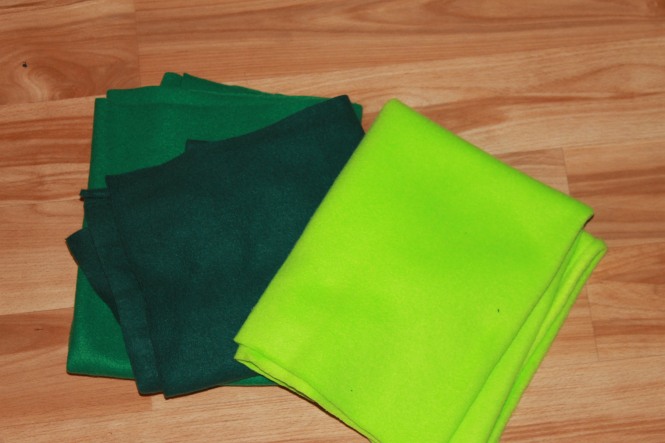
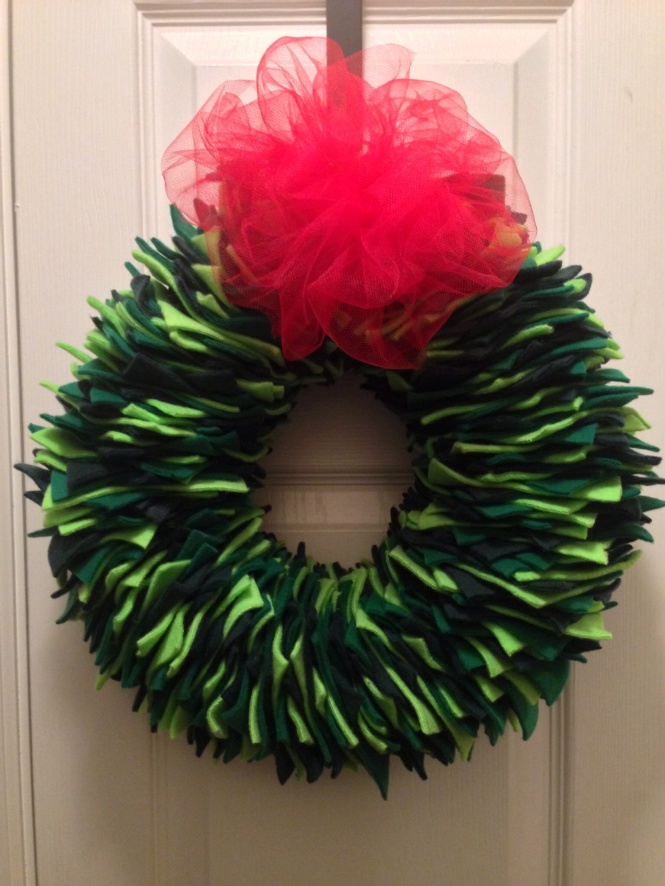
The first item that we will look at is a whimsical wreath that brings a fun twist on the traditional evergreen.  All you will need for this project is about two hours, some heavy gauge wire, and fleece in three shades of green (1 yard of each color).
IMG_8891

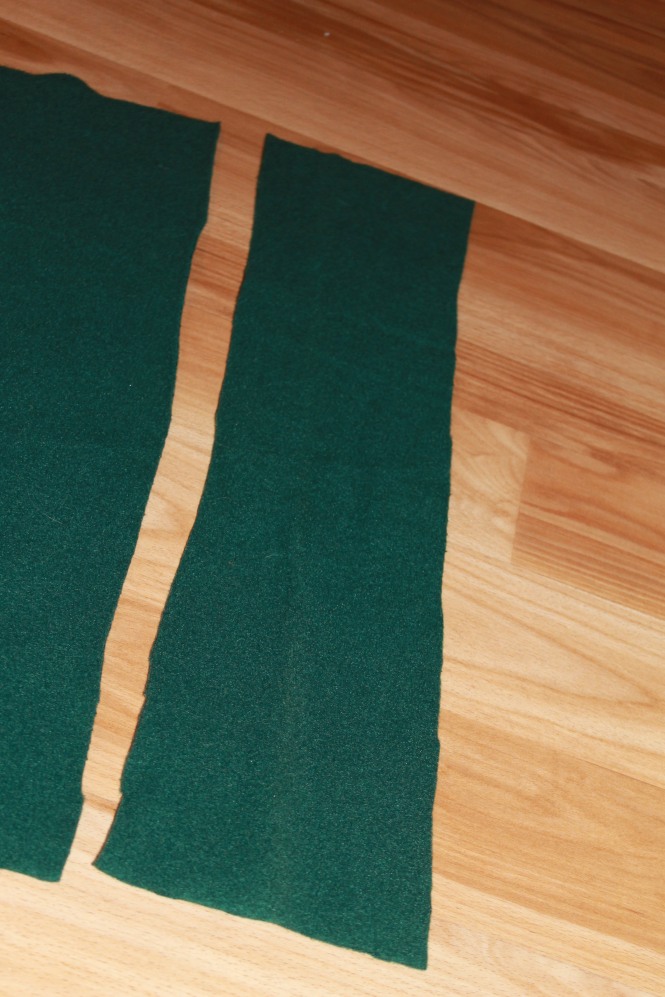
After stretching out the fleece, I began to cut strips 4 inches wide.  I wasn’t exact with this either, because the irregularity will help give your finished wreath extra fullness.
IMG_8889

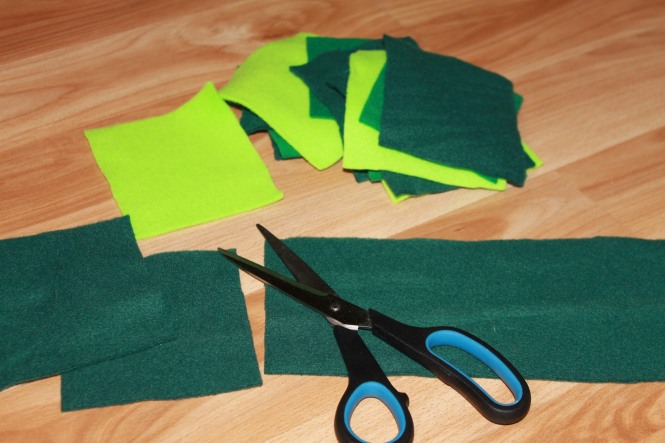
When all the strips were cut, I then divided the strips into 4 inch squares.
IMG_8892

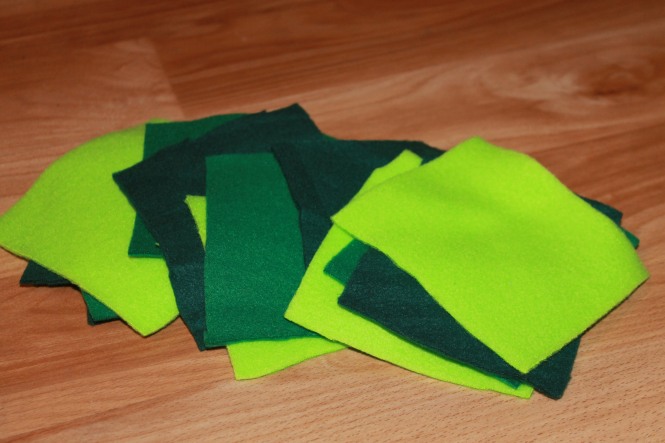
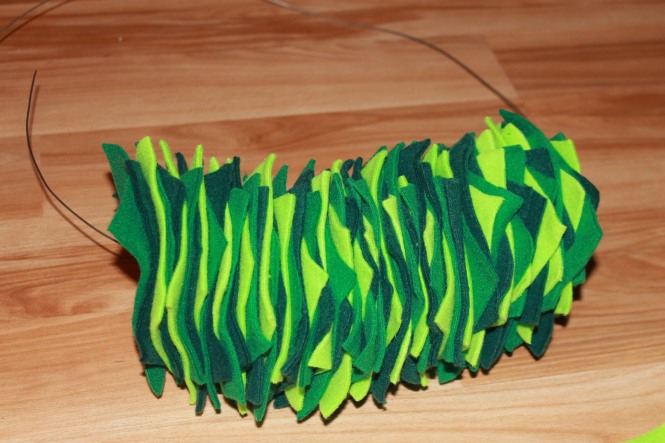
One at a time, I feed each square onto the wire (alternating the three colors), making sure that no piece laid flush with the last.
IMG_8887IMG_8888

When all the squares were wired together, I tightly twisted the two ends together and filled in the gap by adjusting the squares.  I covered the remaining gap with a red burlap bow.  You could use any fabric to make a bow, or buy a premade bow.
image

To add another layer of personality, consider hot gluing red buttons in groups of three to the wreath to give the look of holly berries.  After some fluffing, this wreath was ready to deck the halls.

This concept doesn’t have to be limited to the Christmas season.  I think this idea would be great for other rooms in your home, year round.  I could really see this wreath in a girls bedroom with coordinating colors from their bedding.

Snowman
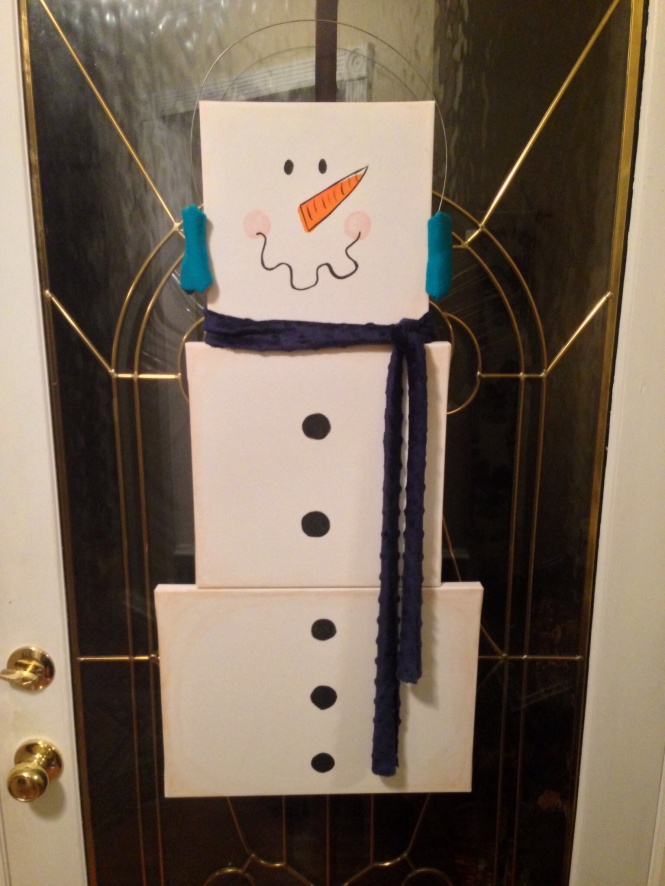
You’ve heard of the abominable snowman, but this is the adorable snowman.  This festive hanging is so easy and is such an eye catcher.  An added bonus is since it’s not heavy “holiday” décor, you can leave him (or her) displayed until February.  For this project you will need 3 canvases (12×16, 12×12, and 10×10), some craft paint, two sticks from the woods, a hot glue gun, and a strip of fleece/fabric.

To get started, you’ll need to water down some brown paint and brush the corners of canvases to give them some dimension.

On the bottom two canvases you will paint “buttons” (three on the bottom, two on the middle) by painting black spots down the middle.

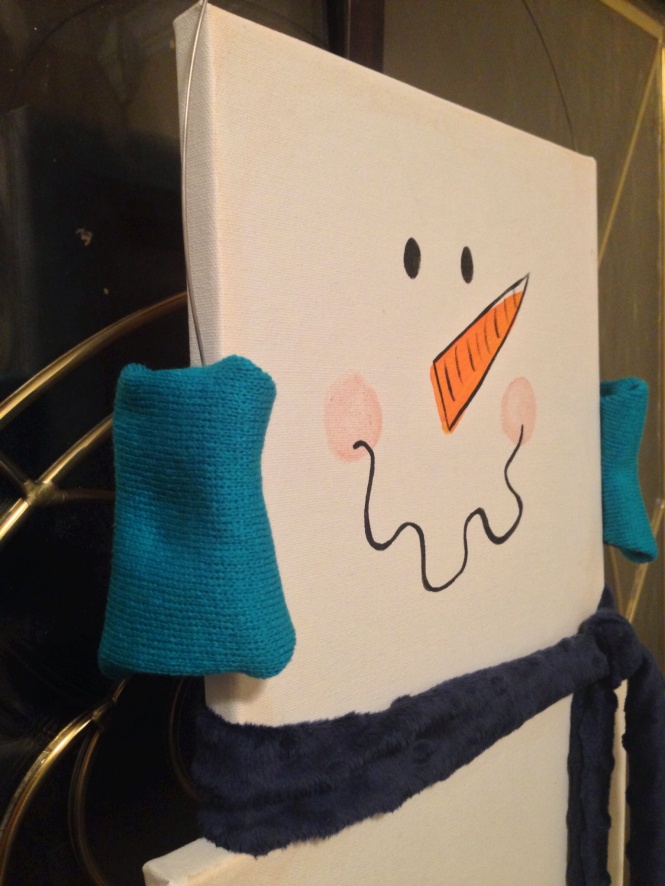
Next, you will need to add some personality to your snow person by giving them their face.  I watered down some red paint to give my snowman rosy cheek.  By adding black coal eyes, a carrot nose, and a squiggly smile, my snowman is ready for winter.
image

Once the paint is dry, it’s time to secure the canvases to one another.  I found that hot glue was best because it dries quickly and creates a great bond.
image

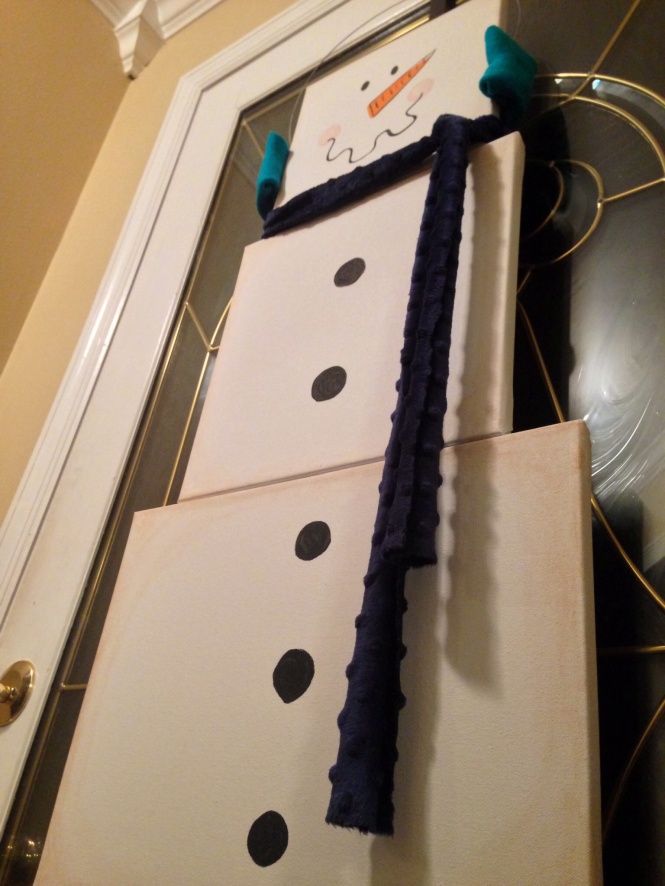
When the glue is set, all that’s left to do is add the finishing touches.  Choose fleece or fabric that goes will with your décor and simply tie it around the neck, allowing the ends to hang to the side.
image

You can easily leave your snow person as is, but I chose to add some earmuffs to help Frosty brave the winter chill.  To achieve this, I glued some heavy gauge wire on each side of the top canvas and then covered up the ends with my ear muff made of fabric.

It’s that easy!  This adorable creation will be a great conversation piece for your guests during the holiday season.  It packs tons of personality and is so easy to construct.  And the best part is this Frosty won’t melt inside your warm and toasty holiday home.

Cheese Hoop “Wreath”
I hope you have your “repurposing” pants on because we’re about to turn out a cute creation from grocery store junk.

At our local Piggly Wiggly, they sell fresh hoop cheese.  This zesty cheese comes in a round, wooden crate.  After the store takes the cheese out they sell the empty crate for next to nothing ($2 to be exact).  Now I fully understand that you may not have the privilege of being near a Piggly Wiggly, but I’m sure your local market that sells fresh cheese will have these crates also.

For this project we are only going to be using the lid of the crate.  There are lots of things you can do with the bottom, but we will save that for another day.

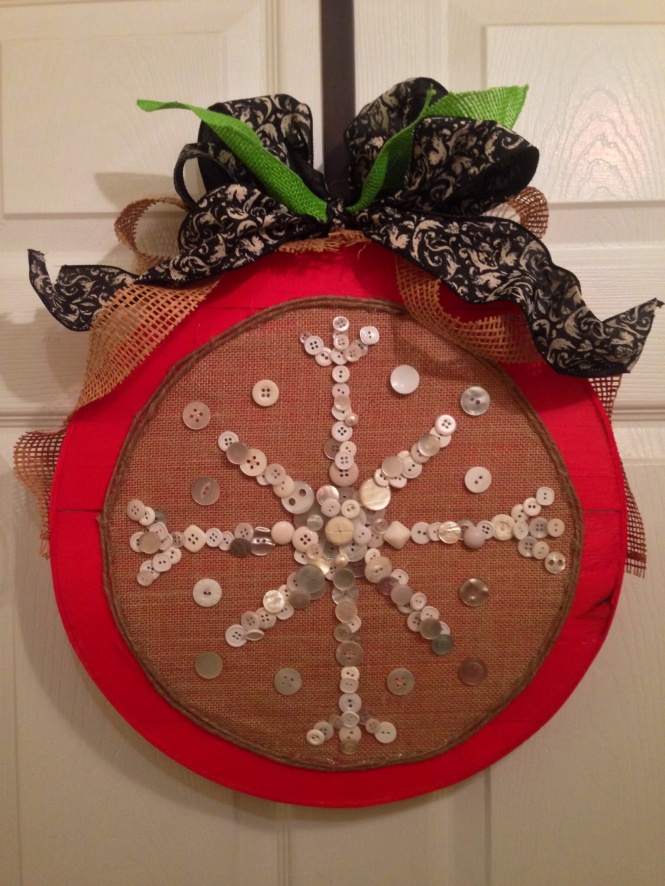
I chose to paint my lid a festive, holiday red.  You will need several coats of paint in order to achieve a vibrant hue.  Otherwise, the untreated wood will soak up a lot of the color.
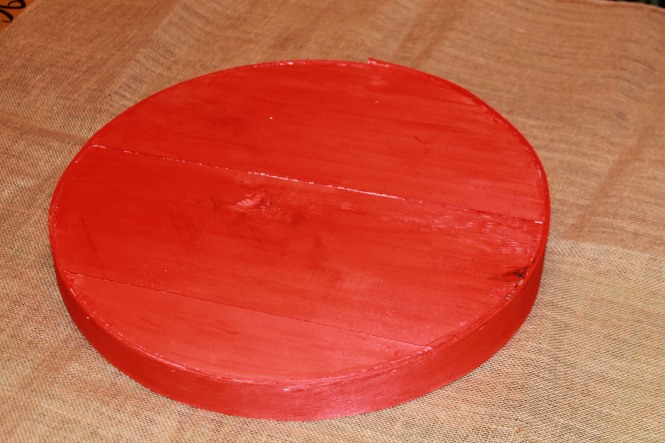
IMG_8966

When I achieved my desired color, I cut a circle out of burlap using a large bowl as my tracing guide.  Utilizing my trusty hot glue gun, I attached the burlap to the center of the lid.

In an attempt to hide the edges of the cut burlap, I glued twine to give it a more finished look.
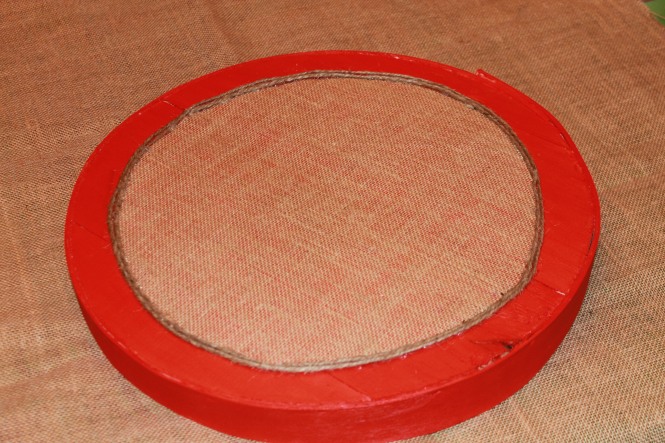
IMG_8972

After finding a cute snowflake design that I liked, I traced the outline and began to place a variety of white buttons onto the burlap.  The beauty in this snowflake comes from overlapping the different buttons to create your masterpiece, giving it dimension.
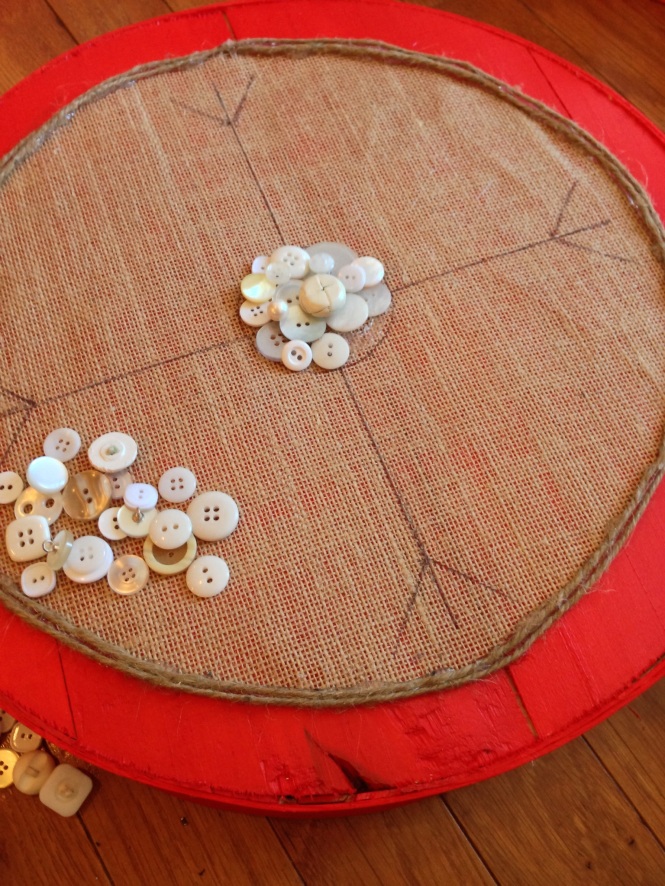
Button Wreath Progress

If snowflakes aren’t your thing, you can use the process to create something that is more in line with your taste.  Maybe a large block letter of your family name, a whimsical ornament, a star…the sky is the limit.  Go wild with it!
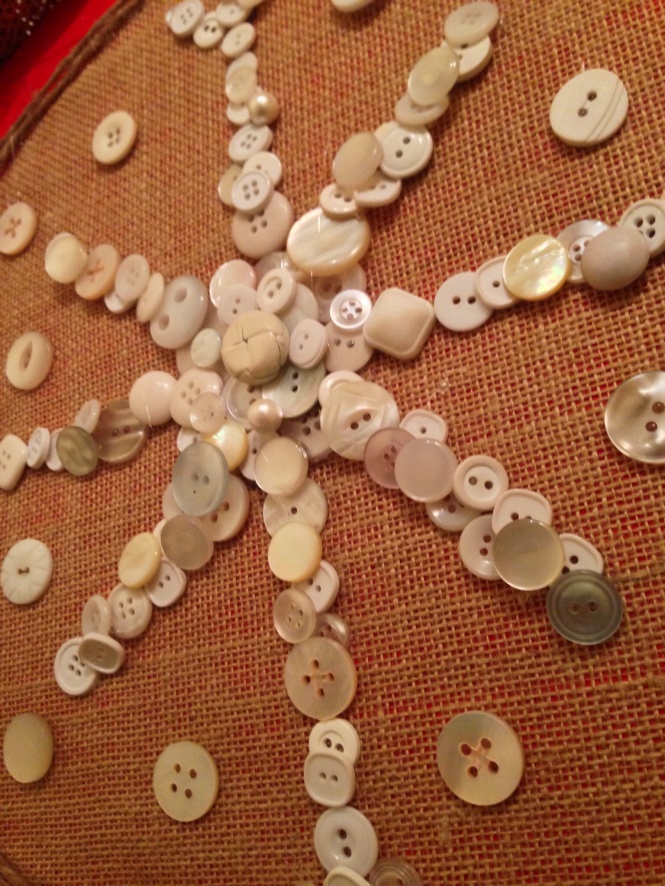
image

When my snowflake was complete, I attached ribbon (you guessed it…with hot glue) to the top of the lid to add an extra pop to the design.  Using a traditional wreath hanger, I was ready to decorate my door with my finished product!
image

Now that you have three options of wreath alternatives, there’s no excuse for a plain, drab door this holiday season.  I hope you have fun creating these wreaths that are sure to last longer that your fresh greenery.  So get busy preparing your wreath to deck the doors of your home as you continue, as always, to stay stylish!

A Stylish Steed Christmas – Day 5

One of the most exciting things about the holiday season is participating in family traditions.  For as long as I can remember my family has shared in two particular traditions that always take me back to my years as a child.

One Steed family tradition occurs on Christmas Eve night.  For as long as I can remember, we pile into our car and as a family we venture into the surrounding towns and look at Christmas lights together.  We have our annual stops that we love to make, but also veer off our scheduled path to see some new places that we have heard about during the season.

The second tradition takes place on Thanksgiving night.  After the meal is put away and our bellies are full, Dad and I bring in the Christmas tree (normally with much grumbling because of the ordeal) and we begin to pull out all the ornaments that we have accrued over the years.  Most of them have a story associated with them.  It’s always fun to reminisce as Mom meticulously places each ornament on just the right branch.

Ornaments are such a huge part of Christmas for most families.  Whether they are handmade items from years past or expensive ornaments that are exquisite and delicate, they all bring to mind memories that bind families together with thoughts of good times and holiday cheer.  Sometimes placing those items on the tree amidst all the other tinsel and lights is a waste.  They are all lost in all the busyness.  Oftentimes, some of the ornaments we love simply don’t match the style of our tree decorations.  Regardless the reason, some ornaments need to be uniquely displayed for all your guests and family to see throughout the holiday season.  It is with that thought that I decided to share a few special ways to display these precious ornaments in your home.

On the fifth day of Christmas The Stylish Steed gave to me, creative looks for ornament hanging.

Raking in the Memories
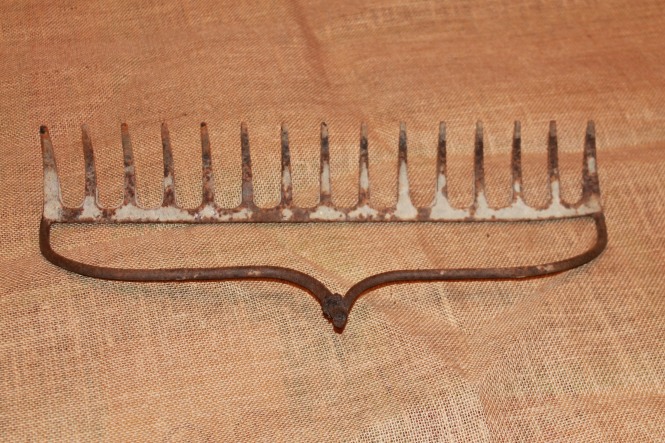
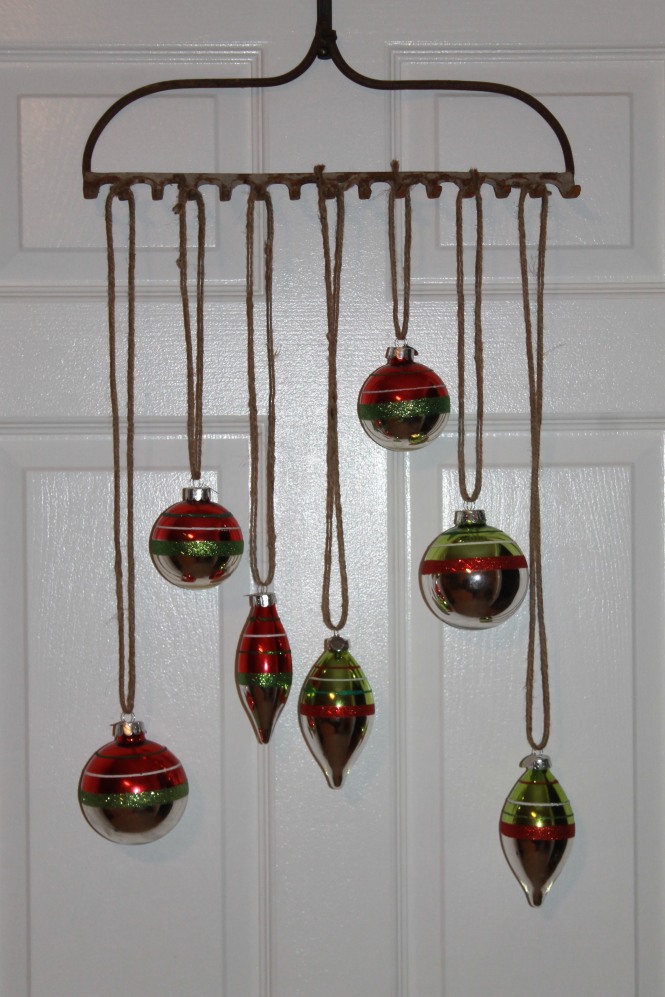
With such rich memories surrounding your ornaments, what better way to display them than a vintage item from generations past.  This rustic way of displaying your ornaments may take you out to the shed to find your grandfathers old metal rake head.  By removing the head of the metal rake from the wooden handle you are left with a rich piece of family history from which to hang your ornaments.

IMG_8965

 Depending on the size of your rake head, you can choose to hang an ornament on each prong or alternate them to show off just a few ornaments.  This would be a great addition to a wall in your dining room that is sure to get a lot of traffic during the holidays.  I simply hung this rake on a door from a wreath hanger.  For photo purposes, I left the rake very bare.  In real life I would liven it up with a bow up top.

IMG_8963

And on a side note, this is a neat piece you can use after the holidays to house your nice wine glasses for an unconventional wall hanging.

A Window to the Past
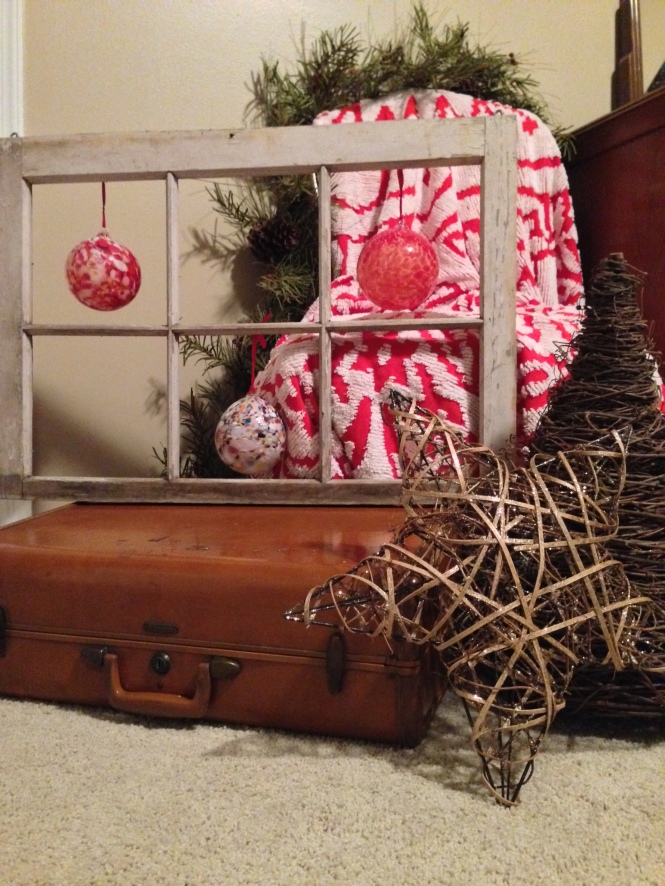
I am constantly in search of old windows.  I don’t care if the glass is broken, panes are missing, or the paint is chipped…I love to find them and reuse them for multiple things (we’ll discuss those purposes on a later date).  One of those great ways to re-purpose windows is to use them for framing your holiday ornaments as artwork.  By simply suspending the ornament from ribbon that is attached to the back of the window frame, you highlight those pieces for all to see.  Display your window over in a corner with other decorations or prop it up in the kitchen or in a shelving unit for all your guests to see.  Wherever you decide to put this, it will get attention and also showcase your valued pieces.

window ornament

My precious god-daughter, Lilly, handmade these beautiful ornaments for my family.  There is an awesome place in Fort Payne, Alabama called Orbix Hot Glass.  Orbix creates some amazing pieces and they have been featured in publications nationwide.  Lilly created these for us and they are just too special to be hidden in the branches of our Christmas tree.  I staged my window with a chenille throw over a chair, greenery, an old suitcase, and some grapevine pieces.  I love the vintage look created here with all these pieces that work together to highlight my Lilly’s hard work!

Chad and Lilly Halloween

This is me and my little Southern Belle (literally) at Halloween!  I adore this little girl!!!  I just had to show you how cute she is.  Now back to the ornaments!

Shedding Some Light
Many times during the holiday season we gather around the dining room table for food and fellowship.  What better way to present your ornaments than by hanging them from the light fixture.  By cutting ribbon and cords at various lengths and dangling the ornaments from the chandelier, you add to your tablescape display and spotlight your prized Christmas possessions.  I chose to suspend my ornaments with a combination of glittered rope and jute to best compliment the existing decor of my home.

IMG_8959

IMG_8957

There are many variations to this you could explore.  Be creative and use your space to showcase your winter wonders.  If you don’t have a chandelier, consider suspending a branch from the ceiling with fishing line and hang your ornaments at varied heights from the branch.

Now that you have these ideas for displaying your favorite ornaments, maybe you will be inspired to look around your home for other unique ways to showcase your items.  Don’t let limited space restrain you from showing your friends and family your important memories.  Stay creative, stay resourceful, but always…stay stylish!

Have You Been Spooled Lately?

As a southerner through and through, there’s nothing more satisfying than gathering on the porch with friends and family. Add to that some amazing food, a refreshing beverage, and conversation of happy memories (or the latest town gossip), and you’ve got a good ‘ole time on your hands.

A southerner’s porch is an inviting space where you can sit a spell and talk about anything from the weather to Jesus and anything in between.  It’s during these times that one may discover that an old rocker glider’s subtle creaking can drown out the noise of the world. Growing up, I never understood why my parents and grandparents found enjoyment just “sittin” there, sometimes in silence, watching the day pass. As I have gotten older I have found  a certain peace on the porch. For me, it’s a time my friends and I call BPT, Back Porch Therapy. We gather together and relieve ourselves through conversation from the worries and stress of the day. For us, what happens on the porch better stay on the porch.

Back Porch Area

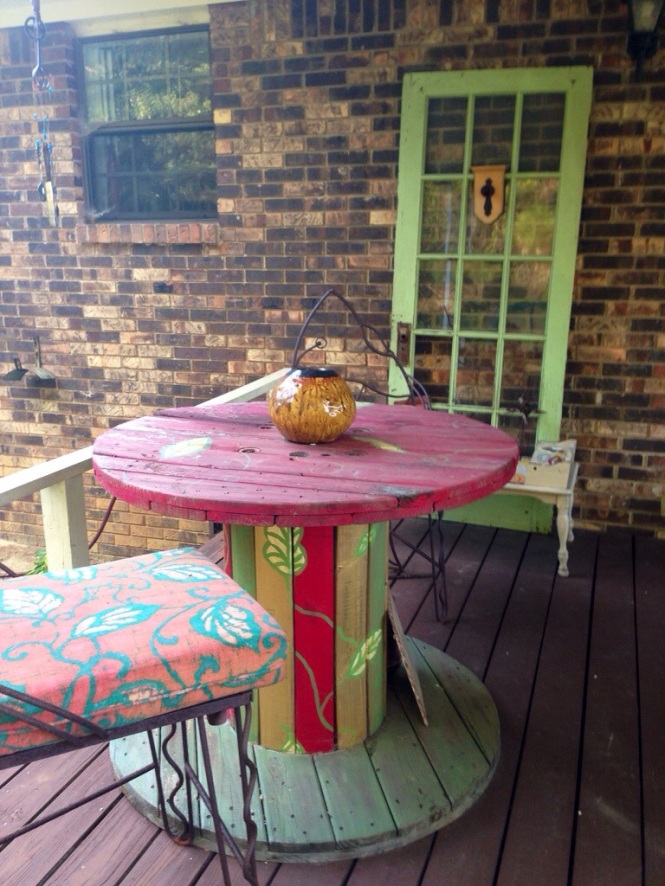
Being an entertainer at heart, I love to adorn my porch with unique items that serve just as much as a conversation piece as they do functionality. One of those items for me are my old wooden spools. Everyone that cops a squat on my porch always makes mention of these pieces. They may be exactly what you need to bring your outdoor living room to the next level.

On a visit to the Cherokee Electric Cooperative, our local electricity provider, to pay that dreaded monthly bill, I noticed some very unique pieces on their back lot. After inquiring about them, I was taken to the inner sanctuary of the Co-Op…that gated area filled with utility trucks and tools of the trade. In a freestanding, covered storage area, there were piles of wooden spools once used to hold power lines and cables before they were strung from pole to pole delivering power to our homes.

Co-Op Spools

I was pleasantly surprised when I was given these spools for free. I was about to add massive personality to my porch for next to nothing. Talk about a deal!  After purchasing some craft paint from the local craft store, I began the journey of transforming these “dumpster ready” spools into works of art that would become dining areas, seating options, coffee tables, and…just about anything I could imagine.

The old, distressed slatted wood opens up a world of possibility as you create that eye-catching piece for your area. I chose to add maximum impact by painting all the slats in the middle column with alternating colors. To maintain the integrity of the wood, I didn’t put a heavy coat of paint so I could still see the grain of the wood and also any printing that was placed on it at the Co-Op. I then free-handed some abstract vines and leaves with a pencil to make sure they were spaced evenly and later went over them with paint. After a coat of paint on the top and bottom it was ready to display and use.

Completed Table.jpg

As long as these pieces stay under a covered area you won’t even need a sealant on them.  And don’t even give me this mess about, “I don’t know how to paint,” or “I’m not artistic like that.” My mother, a retired art teacher in a public school system, had a quote in her classroom by Vincent Van Gogh that said, “If a voice within you says you can’t paint, then by all means, pick up a brush and paint and the voice will be silenced.”  If it’s good enough for Vinny, then it’s good enough for you!

table top

Maybe that piece is too much for you.  It does require a somewhat larger space to accommodate such a piece.  If it’s the height that scares you away, simply cut them in half and create two coffee tables. Use one for yourself and sell the other one to a friend who hasn’t taken advice from The Stylish Steed. You’ll be surprised at what people will pay for pieces like this. The creation of coffee tables is awesome because the design allows for foot space under the top.

Furthermore, if this spool is too large for you all together, it might serve you better to get one of the smaller spools to utilize.

Small Spool

The spools of this size could serve double duty for you and your guests.  After applying your desired color scheme and design, you can use them as end tables or put children’s chairs around them for a dining/play table.  Another option is to throw a round cushion on them and have additional seating.  You could even cover the top with quilt batting and fabric to create a padded top for your seat.  If you are convinced you want end tables, you could even have a piece of glass cut to add a more polished, finished look.

So now that you’ve been schooled on how to get spooled, head to your local power company and relieve them of their garbage. Have fun creating unique pieces that fit your space perfectly. Think outside the box and bring in color and print to your new furniture. Also, don’t be hesitant to share your new creations with me. I’d love to see your creativity as you continue to stay stylish!

20131024-172226.jpg