A Window Never Forgets

The great Nathaniel Hawthorne once said, “Time flies over us, but leaves its shadow behind.”  With the passing of time we often find that the shadow of our past becomes faint.  It becomes more and more difficult to remember when that shadow was first cast.  It is then that we become thankful for the tangible items we have that represent those years.  What better way to embrace and remember those times than by making a beautiful, decorative piece for your home.

Old windows are one of my favorite things…and hot dogs.  I really love hot dogs.  I digress!

I’m always in search of windows.  I most frequently find them at yard sales or junk stores, but due to the recent increase in popularity they are often priced a little too rich for my blood.  So when I find them for cheap, I snatch them up for future projects.  One such project that will add to your wall decor is this beautiful and personalized memory window.

This particular project was done for a family friend and highlighted their children and grandchildren.  In today’s times of social media, this is even a project you can do as a surprise by canvasing Facebook and other outlets to find great pictures of a friend’s family.

Simply begin by cleaning the glass of the window and deciding how many pictures you would like to showcase.

By cutting the pages out of a photo album found at almost any store, you can secure them to the glass with double sided tape allowing the opportunity for pictures to be changed out in the future.

Photo Album Pages

The pages of an affordable photo album will house and protect the photos

The particular window used in this project was not your traditional, six paned window.  With four column panes, the last name of the family was painted on the first pane with some decorative accents.  By using slick paint that can be purchased at any craft store, you are able to add dimension to your design.  A modified leaf and vine design was used on this window.

Name Panel A Window Never Forgets

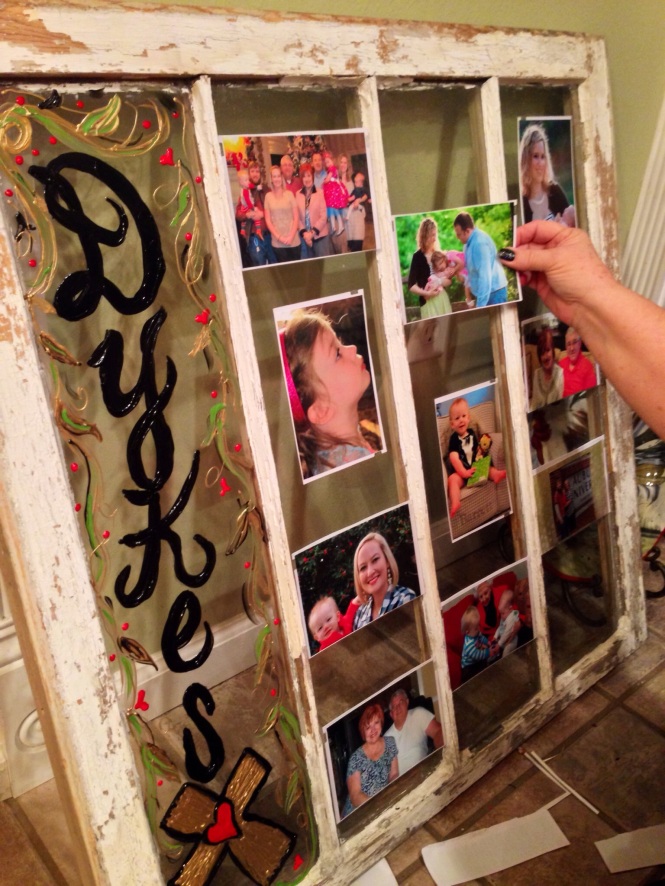
While the “name panel” was drying, the photo sleeves were placed onto window using double sided tape.  Space out the photos as you see fit and allow room for any painted designs that you would like to add.

Picture Placement A Window Never Forgets

Word and Pic Close Up A Window Never Forgets

Customize your window by adding words that reflect the style of your photos

Photo Cluster A Window Never Forgets

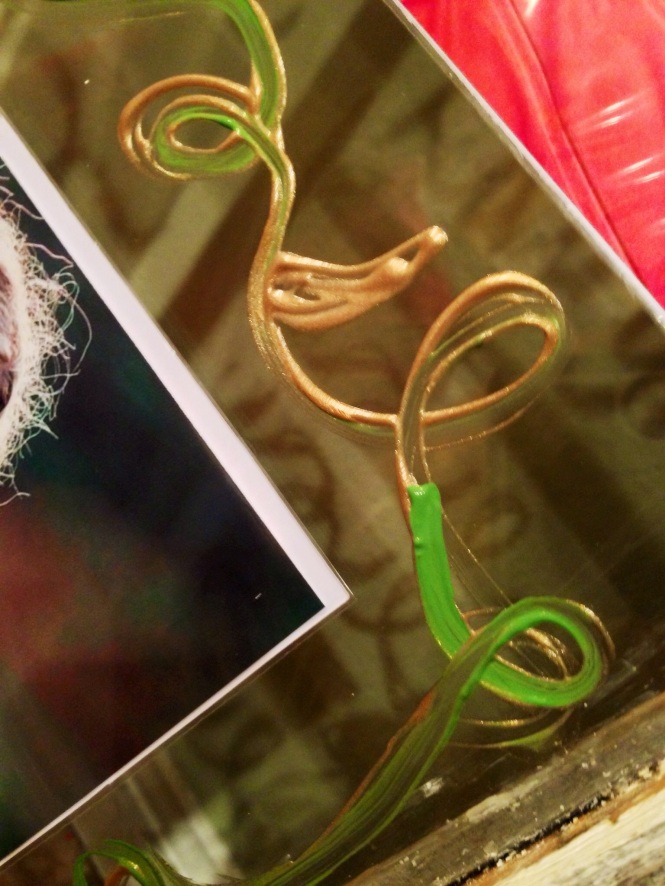
In addition to words, add personality by inserting scroll work, leaves, or decorative accents with slick paint

Corner Detail A Window Never Forgets

With a light brush stroke you can easily create accents that add to your design

Once you have completed all your photo placement and painted accents you are ready to add your fixtures to hang your window.

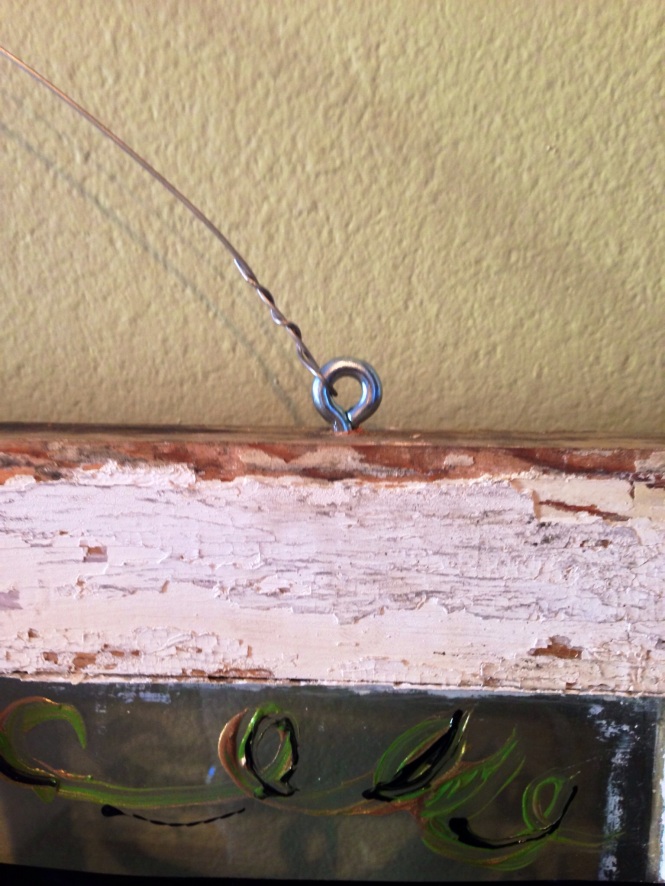
Eye Hook Hanger A Window Never Forgets

By inserting a basic eye hook, you can attach a heavy gauge wire from which to hang your window

Now you are ready to hang your beautiful wall decor!  The weight of the window can possibly be an issue so make sure you use a fixture that is sturdy enough to support your Memory Window.  I recommend something like a Hercules Hook.  They are great for anchoring large items, but do not damage your wall.

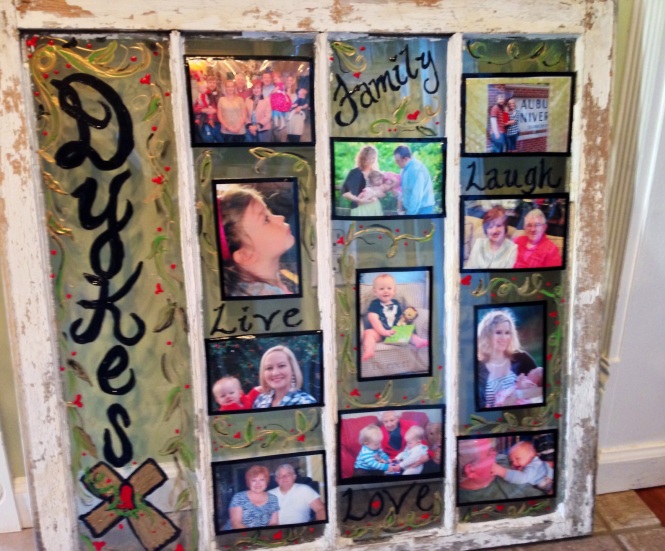
Completed Window A Window Never Forgets

Even though our minds fail us and the memories may fade, you can always remember the past with a beautiful item like this displayed in your home.  Have confidence in your work and add your own style and flair to this piece and enjoy it for years to come.  Your creativity and little DIY know-how is sometimes all you need to stay stylish!

A Stylish Steed Christmas – Day 5

One of the most exciting things about the holiday season is participating in family traditions.  For as long as I can remember my family has shared in two particular traditions that always take me back to my years as a child.

One Steed family tradition occurs on Christmas Eve night.  For as long as I can remember, we pile into our car and as a family we venture into the surrounding towns and look at Christmas lights together.  We have our annual stops that we love to make, but also veer off our scheduled path to see some new places that we have heard about during the season.

The second tradition takes place on Thanksgiving night.  After the meal is put away and our bellies are full, Dad and I bring in the Christmas tree (normally with much grumbling because of the ordeal) and we begin to pull out all the ornaments that we have accrued over the years.  Most of them have a story associated with them.  It’s always fun to reminisce as Mom meticulously places each ornament on just the right branch.

Ornaments are such a huge part of Christmas for most families.  Whether they are handmade items from years past or expensive ornaments that are exquisite and delicate, they all bring to mind memories that bind families together with thoughts of good times and holiday cheer.  Sometimes placing those items on the tree amidst all the other tinsel and lights is a waste.  They are all lost in all the busyness.  Oftentimes, some of the ornaments we love simply don’t match the style of our tree decorations.  Regardless the reason, some ornaments need to be uniquely displayed for all your guests and family to see throughout the holiday season.  It is with that thought that I decided to share a few special ways to display these precious ornaments in your home.

On the fifth day of Christmas The Stylish Steed gave to me, creative looks for ornament hanging.

Raking in the Memories
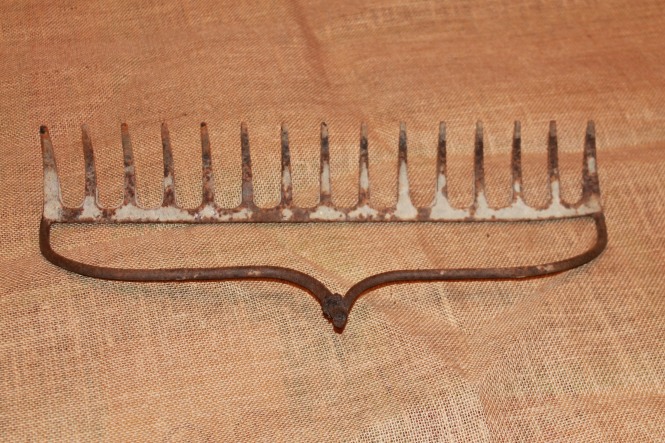
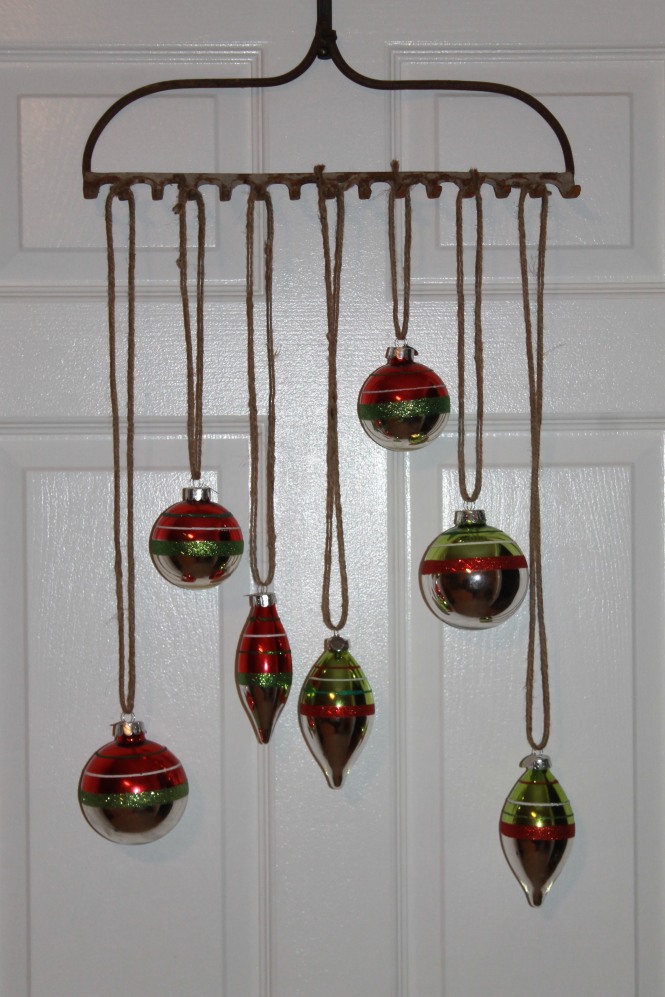
With such rich memories surrounding your ornaments, what better way to display them than a vintage item from generations past.  This rustic way of displaying your ornaments may take you out to the shed to find your grandfathers old metal rake head.  By removing the head of the metal rake from the wooden handle you are left with a rich piece of family history from which to hang your ornaments.

IMG_8965

 Depending on the size of your rake head, you can choose to hang an ornament on each prong or alternate them to show off just a few ornaments.  This would be a great addition to a wall in your dining room that is sure to get a lot of traffic during the holidays.  I simply hung this rake on a door from a wreath hanger.  For photo purposes, I left the rake very bare.  In real life I would liven it up with a bow up top.

IMG_8963

And on a side note, this is a neat piece you can use after the holidays to house your nice wine glasses for an unconventional wall hanging.

A Window to the Past
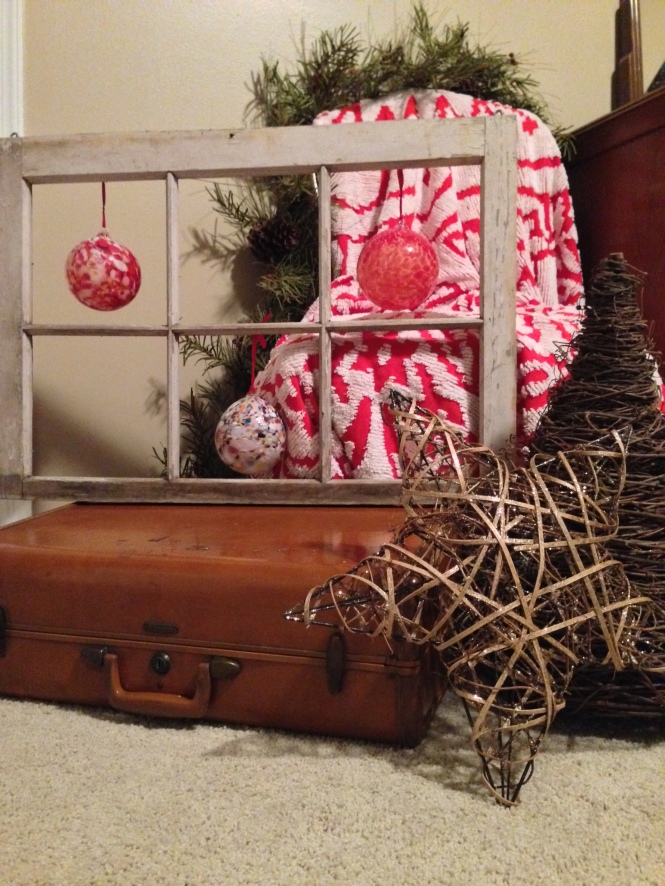
I am constantly in search of old windows.  I don’t care if the glass is broken, panes are missing, or the paint is chipped…I love to find them and reuse them for multiple things (we’ll discuss those purposes on a later date).  One of those great ways to re-purpose windows is to use them for framing your holiday ornaments as artwork.  By simply suspending the ornament from ribbon that is attached to the back of the window frame, you highlight those pieces for all to see.  Display your window over in a corner with other decorations or prop it up in the kitchen or in a shelving unit for all your guests to see.  Wherever you decide to put this, it will get attention and also showcase your valued pieces.

window ornament

My precious god-daughter, Lilly, handmade these beautiful ornaments for my family.  There is an awesome place in Fort Payne, Alabama called Orbix Hot Glass.  Orbix creates some amazing pieces and they have been featured in publications nationwide.  Lilly created these for us and they are just too special to be hidden in the branches of our Christmas tree.  I staged my window with a chenille throw over a chair, greenery, an old suitcase, and some grapevine pieces.  I love the vintage look created here with all these pieces that work together to highlight my Lilly’s hard work!

Chad and Lilly Halloween

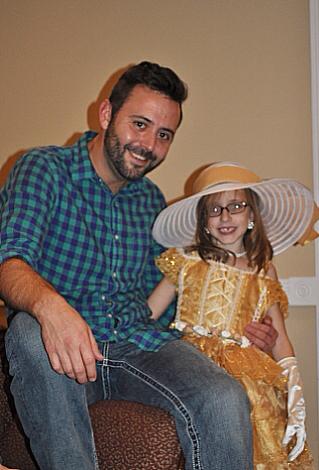
This is me and my little Southern Belle (literally) at Halloween!  I adore this little girl!!!  I just had to show you how cute she is.  Now back to the ornaments!

Shedding Some Light
Many times during the holiday season we gather around the dining room table for food and fellowship.  What better way to present your ornaments than by hanging them from the light fixture.  By cutting ribbon and cords at various lengths and dangling the ornaments from the chandelier, you add to your tablescape display and spotlight your prized Christmas possessions.  I chose to suspend my ornaments with a combination of glittered rope and jute to best compliment the existing decor of my home.

IMG_8959

IMG_8957

There are many variations to this you could explore.  Be creative and use your space to showcase your winter wonders.  If you don’t have a chandelier, consider suspending a branch from the ceiling with fishing line and hang your ornaments at varied heights from the branch.

Now that you have these ideas for displaying your favorite ornaments, maybe you will be inspired to look around your home for other unique ways to showcase your items.  Don’t let limited space restrain you from showing your friends and family your important memories.  Stay creative, stay resourceful, but always…stay stylish!

Watch Me Fall On My Front Porch

Happy Fall Y’all!

As I have stated many times before, I absolutely love the fall season.  Not only is it a time to vamp up your wardrobe, but it is also a great season for decorating.  One of the best places to display eye-catching decor is on your front porch.  Adding personality to your front porch is a great way to welcome guests into your home.

I love to look at fall and harvest displays that my neighbors put out during this time of year.  Now is the time that my street is overtaken with scarecrows, bales of hay, explosive colors of mums, and pumpkins.  Not to be outdone, I also like to “fall” on my porch as well.  As it is in other aspects of my life, I do not like to present anything to the public eye that is a cookie cutter idea.  I love to be an individual and strive to think outside the box to show things that are not the norm.

Full Porch

Here are some neat ideas that you might could incorporate into your fall/harvest display…inside or out.

Unconventional Pumpkins

With my Great Depression mindset (buy it up, save it up, use it up) I love the idea of taking “scrap items” and transforming them into something new. One such item would be these rustic pumpkins.

Last spring, after deciding to work heavily in my flower bed, I removed some pre-existing landscaping timers.  Items like these weathered timbers are great to reuse for decorative purposes.

Wooden Planks

After cutting these timbers in various lengths, you can paint them orange with some craft paint that is readily available at any local craft store.  As to create a more rustic look, you don’t have to be very meticulous with your brushwork.

While the paint dries, head into the woods and find some branches that you can snap into pieces to form the stems.

Next, drill a small hole in the top of each pumpkin and secure the branch with some wood glue.  Now that the paint is fully dry, rough up a few spots with sand paper to add to the rustic feel.

After tying some raffia around the stem, they are ready to display.

Finished Pumpkins

You always want to make sure to group items like this in uneven numbers.  Photographers and decorators call this “THE POWER OF THREE.”  It creates a grouping of the items that draw the eye and adds personality to your total design concept.

Potted Plants

Another focal point I like to add to my fall decor is potted plants.  Most people choose to use mums during this time of the year.  Mums are nice, don’t get me wrong…I even have a couple on my porch, but EVERYONE uses mums.  I like to add something a little different…cabbage plants.  There are many different varieties of cabbage that offer unique texture and colorful accents.  I choose to plant mine in a decorative, hand painted pot that I purchased years ago at an “end of the season sale” at my local flower mart.  The vibrant hues of the pot, paired with the texture and color of the cabbage create another great aspect to your overall design.  To add a little more color, stick some pansies or another fall friendly flower in the pot.

Cabbage Collage

Pop of Color

Last, but not least, consider adding color to your porch (and overall look of your home) by changing the color of your front door.  I know you may think this is crazy, and I’m definitely not suggesting that you change your front door color every season.  However, consider adding intense personality by selecting a color that is highly transitional for all seasons.  My home is a brown variegated brick and can be quite drab if I did not choose to infuse color in all aspects of my curb appeal.  My front door is a bright pop of color that brightens the entire facade of my home.  I chose Chopped Chive for my front door and have found that it is a great color that is compatible with all seasons.  I encourage you to have fun with this and experiment with different options that will really amp up the look of your home.  Break out of the norm and be the talk of the town with your vibrant color selections.

Front Door

Also…I added a nontraditional piece to my front door to set it off even more.  A deconstructed pallet can do amazing things.  I have an “S” made from a pallet with a variety of colors to bring everything together.

Hope you have as much fun “falling” on your porch as I do on mine!  In the meantime, stay stylish!